🖊️ How to Request eSignature in Client Hub
Client Hub provides eSignature services powered by SignWell.
⚠️ Before You Start: Client User Required
🧐You must have at least one Client User added to the client’s workspace before creating or sending an eSignature request and they have to have accepted the invitation.
If no Client Users exist, you will see this error after uploading your document:
“There are no client users in this workspace, so eSignature request cannot be sent.”
This requirement applies even if you plan to use Get Link.
👉 eSignature request expire in 30 days
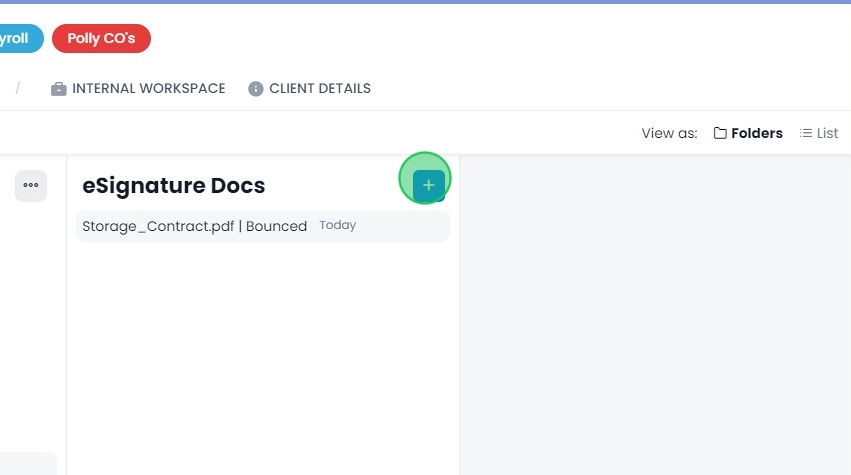
📁 Step 1: Open eSignature Docs
- Select the client from My Client List
- Click the File Manager tab
- Click eSignature Docs
- Click the + (plus) button
- Select Request eSignature
📄 Step 2: Upload the Document
Drag and drop your file into the upload box or click to select it from your device.
Click Next.
If you receive a “no client users” error, add a Client User to the workspace before continuing.
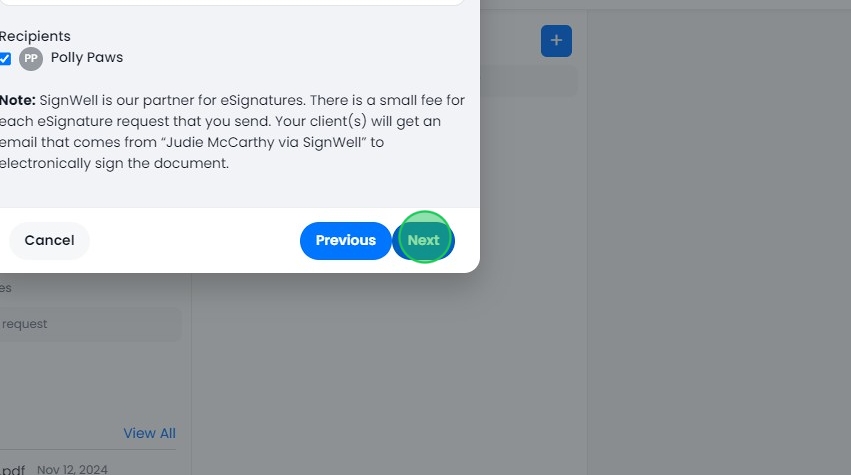
👥 Step 3: Select Recipient
Choose the recipient from the list of active Client Users in the workspace.
Click Next.
Only Client Users in this workspace can be selected.
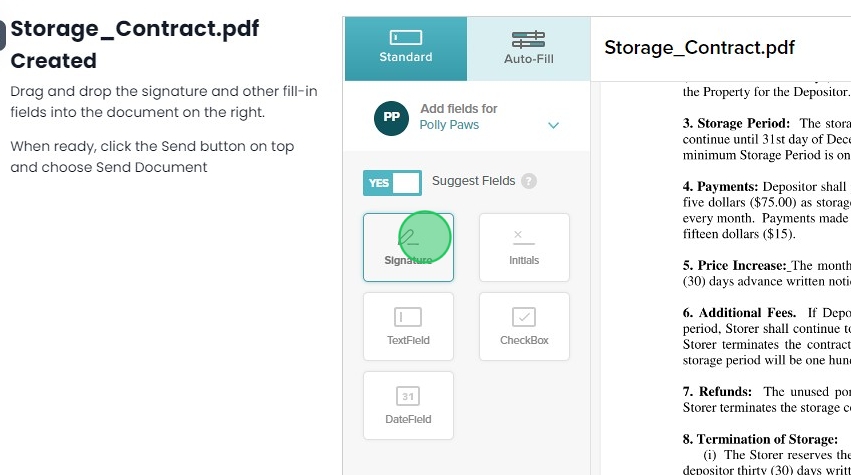
✍️ Step 4: Add Signature Fields
Drag and drop signature and any required form fields into the document.
Click Next when finished.
✉️ Step 5: Send or Share
You have two options:
Send Document (Email)
Click Send Document to email the request to the recipient’s Client Hub login email.
The document moves from Draft to Shared.
🔔 When the recipient completes and signs the document, a notification will be sent to the Firm User who created the eSignature request.
Get Link (Manual Sharing)
To send the document yourself (for example, in a Client Task):
- Click Get Link
- Click the Copy button
- Save the link before proceeding
The Get Link option is only available while the document is in Draft.
Once the document becomes Shared, the link cannot be copied again.
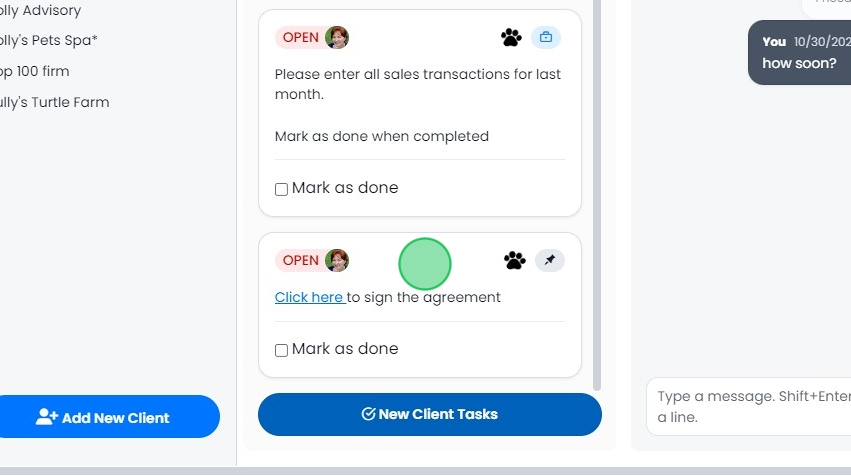
🔗 Send via Client Task (Optional)
If using a signing link inside a Client Task:
- Go to the client’s workspace
- Click New Client Tasks
- Write your message
- Highlight text and click the link icon
- Paste the copied signing link
- Click Send and Notify
🛠️ Troubleshooting
Error: “There are no client users in this workspace…”
This means the workspace does not have any Client Users added.
To fix:
- Add a Client User to the workspace
- Confirm they appear as active
- Restart the eSignature request
You cannot proceed without at least one Client User in the workspace.
How To Request eSignature in Client Hub
1. Navigate to the File Manager
2. Click here.

3. Click on eSignature Docs

4. Click the + button to Request an eSignature
5. Click "Request eSignature"

6. Drag & Drop your files or click to select a file

7. Click "Next"

8. Select the recipient (active user in the workspace)

9. Click "Next"
10. Drag and drop the fields into the document
11. Click "Send Document" to send to the recipients email address

12. Or click "Get Link" to copy the link and add to a Client Task as follows

13. Click "Copy Link"

14. Go to Client Workspace

15. Click "New Client Tasks"

16. Create a client tasks, highlight the text and add a hyperlink

17. Paste the link into the field and click save

18. Click "Send and Notify"

19. The client will click on the link in the Client Task to view and sign the document